The Three Contact Points That Shape a Bicycle Fit
Bicycle fit starts at the saddle, handlebars and pedals. Learn to spot which contact point feels out of place before making a small, sensible adjustment.
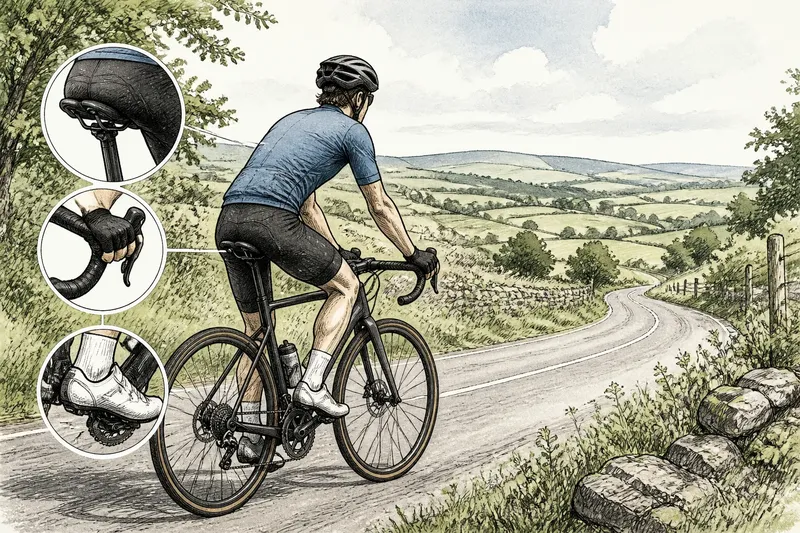
You roll away from home, and before reaching the end of the street, one hand keeps shifting on the bar while your hips settle awkwardly on the saddle. Bicycle fit often becomes noticeable through small, repeated signals like these. The saddle, handlebars and pedals are the three points where your body meets the bike; paying attention to each in turn can help you identify where a change may be needed.
This is a way to observe, not a formula for a perfect position. Start with the bicycle in its usual riding condition, including the footwear you normally wear, and make only a change you can reverse and assess calmly. If a part is damaged, loose or unfamiliar, ask a qualified bicycle mechanic rather than trying to correct it by feel.
Start with a quiet baseline ride
Before changing anything, take a short, easy ride on a familiar, level route. Keep the pace conversational and notice what happens after you have settled into your normal position. A single moment of discomfort can come from a bump, a turn or the way you are carrying yourself; a sensation that returns in the same place is more useful information.
Pay attention without trying to diagnose yourself as you pedal. Ask whether you are sliding forwards or backwards, reaching for the bars, gripping too tightly, rocking at the hips or feeling pressure through your feet. Note which side is affected and whether the sensation appears immediately or after you have been riding for a while.
It can help to make a brief note on your phone after the ride: where the sensation occurred, what you were doing, and whether it eased when you changed position. Avoid changing several things at once. If the feeling changes, you want to know which adjustment might have contributed.
Check how the saddle supports you
The saddle should support your weight without making you brace against the handlebars or constantly move to find a comfortable spot. Notice whether you feel stable across the saddle, whether you are sliding towards either end, and whether pressure is concentrated in a small area. These clues can point to the saddle’s height, tilt, fore-and-aft position, shape or width, but they do not identify the cause on their own.
At a comfortable pedalling pace, watch what your hips do. If they rock noticeably from side to side, or you feel you must reach with your toes at the bottom of each pedal stroke, the saddle may be too high for your current position. If your knees feel crowded near the top of the stroke, the saddle may be low, though stance, crank length and flexibility can also affect that sensation.
Check the saddle angle by looking at it from the side while the bike stands on level ground. A pronounced nose-down tilt can encourage you to slide forwards and press more weight into your hands; a nose-up tilt may feel restrictive. Avoid treating a level saddle as a universal target: saddle shape and personal comfort matter, so use only small, reversible changes and follow the seatpost and saddle-maker’s instructions.
Before moving the saddle forwards or backwards, consider whether you are trying to solve a symptom caused elsewhere. A long reach to the bars, for instance, may make you shift on the saddle. If the saddle seems broadly comfortable but your shoulders, hands or wrists are doing the work of holding you up, inspect the handlebar position next.
Notice what your hands and shoulders are doing
Rest your hands on the grips or brake hoods as you usually ride. Your elbows should not feel locked, and you should not need to shrug your shoulders or stretch your neck to see ahead. A position that feels stretched can make you lean heavily on your hands, while a cramped one may leave your elbows folded and your upper body crowded.
Try briefly changing your hand position, if your handlebars allow it, while riding somewhere safe and uncluttered. If one position reduces pressure or makes steering feel more natural, the bar reach, height or angle may deserve attention. If every hand position feels uncomfortable, the cause could also involve the saddle, the shape of the grips or the way you are supporting your torso.
Hand discomfort has several possible sources. Numbness, tingling, persistent pain or a strong urge to shake out your hands is a reason to stop and reassess, not to push through. Check that the grips are secure and in good condition, and make sure brake levers are positioned so your wrists do not have to bend sharply. Changes to stem position, handlebar rotation or control layout can affect steering and braking; have a mechanic assess them if you are unsure.
Think of the bars as a place to guide the bike, rather than a perch that must carry most of your upper-body weight. A relaxed grip and softly bent elbows can help you notice whether you are reaching or bracing. Do not try to force a particular posture if it makes you less stable or makes it harder to control the bicycle.
Read the pressure through your feet
With flat pedals, notice whether your feet rest securely or keep slipping into a new position. Check that your shoes sit comfortably on the pedal and that you are not repeatedly pushing with only the toes or the heels. A foot that feels unstable may be a shoe or pedal issue rather than a reason to change the saddle.
If you use clipless pedals, the cleat fixes where your shoe meets the pedal, so small differences in cleat position can affect how the foot, ankle and knee move together. Do not reposition cleats simply to match a diagram or imitate another rider. If you have pain, a persistent one-sided difference or a history of injury, seek an assessment from a qualified fitter or clinician with relevant expertise.
For any pedal type, notice whether discomfort appears on both sides or just one. A consistent difference can be useful to report, but it does not prove that the pedals are the source. Keep the observation specific: for example, “pressure under the right forefoot during steady pedalling” is more useful than “the bike feels wrong”.
Make one change, then reassess
Once one contact point seems most likely, choose a small adjustment that is straightforward to reverse. Mark the starting position with removable tape or take a clear photograph before changing anything. Use the correct tool, keep the relevant parts securely fastened, and follow the component maker’s instructions; if you cannot tell what a bolt controls or how tightly it should be secured, leave it to a mechanic.
Say you notice that you slide forwards on the saddle and then put extra weight through your palms. Imagine that, after checking the saddle and finding no obvious damage, you make a slight reversible correction to its tilt, then ride the same easy route. The useful result would be an observable change: perhaps you stay settled more easily, or perhaps the hand pressure remains and the saddle no longer seems the main suspect. Either way, you have learned more without changing several parts together.
After any adjustment, check the bicycle while stationary before riding: make sure the saddle, handlebars and pedals feel secure, and confirm you can reach and operate the brakes normally. Then reassess on a calm route, not in traffic or on a demanding descent. If control feels different, stop somewhere safe and restore the previous position or ask a mechanic to inspect the bike.
Which contact point should you check first?
Should I adjust the saddle or handlebars first?
Start with the contact point that matches the clearest repeated sensation, rather than changing parts in a fixed order. If you are sliding on the saddle, inspect how it supports you; if you are reaching or bracing through your palms, assess the bars and your overall position.
Can a bicycle fit feel wrong on only one side?
Yes, a one-sided sensation is worth noticing, but it can have several causes, including footwear, cleat position, riding habits or a health issue. Record where it occurs and seek qualified help if it persists, worsens or limits comfortable riding.
How long should I ride before judging an adjustment?
Use a familiar, easy ride long enough to settle into your ordinary position, and compare like with like. Do not extend a ride through pain; stop if discomfort becomes sharp, persistent or affects your control.
When should a professional assess my bicycle fit?
Ask a reputable bicycle fitter or mechanic if you cannot identify a safe adjustment, if several contact points feel wrong, or if a change affects steering or braking. Consult a healthcare professional for recurring pain, numbness or symptoms that continue away from the bike.
Use the three points as a way to ask better questions
A useful bicycle fit check is not a hunt for one ideal pose. It is a way to connect what you feel at the saddle, handlebars and pedals with what your body is doing, then decide whether a careful adjustment is sensible. The main search phrase, bicycle fit, becomes more practical when you can describe the actual contact and the moment it appears.
Keep your notes and any starting-position photographs together, especially if you later consult a mechanic or fitter. A clear account of where discomfort begins, which side is involved and what changed after a small adjustment gives them a better starting point—and helps you avoid making the same uncertain change twice.